Appearance
User Guide
Learn how to use Despill Maestro with a simple step-by-step workflow.
The Basic Workflow
Follow these steps to remove spill from your footage. We'll walk through the process with options at each stage based on your specific needs.
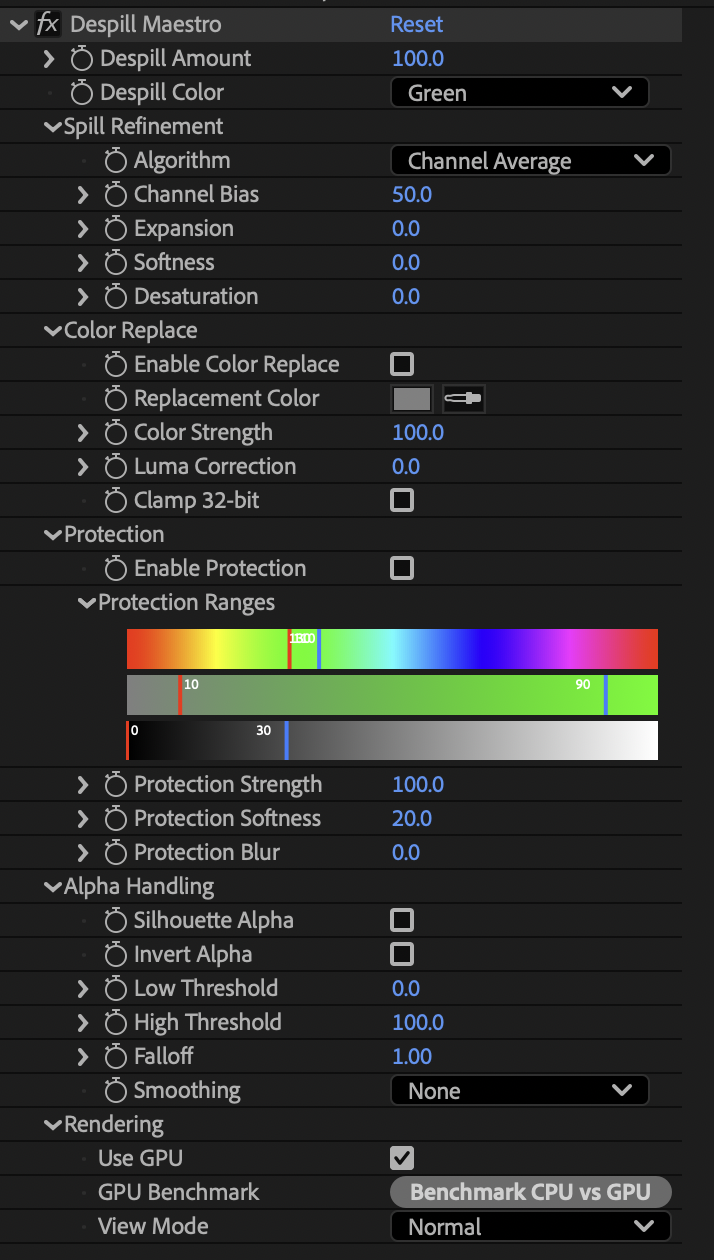
Step 1: Apply the Effect
- Select your footage layer in After Effects
- Go to Effects > Jordan Steele > Despill Maestro (or search in the Effects panel)
- The effect applies with default settings: Green despill at 100%
If you're working with blue screen: Change Despill Color from Green to Blue right away.
If you have a non-standard background color: Set Despill Color to "Custom" and use the color picker to sample your background.
Step 2: Choose Your View Mode
Before adjusting anything, switch to the right visualization mode:
- Find View Mode near the bottom of the effect
- Choose based on what you're doing:
- Spill Map - See where spill is being detected (white = more spill, black = no spill)
- Normal - See the final despilled result
- Protection Mask - See what areas are protected (useful later)
- Alpha - See the alpha channel (if using Silhouette Alpha)
Recommended: Start with Spill Map to visualize the spill, then switch to Normal to see results.
Step 3: Select an Algorithm
Open the Spill Refinement group and choose your algorithm:
For most situations:
- Start with Channel Average (the default)
If you're working with people:
- Try Double Red Average - best for preserving skin tones
If the default is removing too much color:
- Switch to Largest Channel or Exceed Channel Avg by 10% (more conservative)
If spill remains:
- Try Smallest Channel (more aggressive)
Learn more about all 10 algorithms →
Step 4: Adjust Despill Amount
Find Despill Amount at the top and adjust the strength:
- 80-100% - Subtle spill removal
- 100-150% - Standard green screen (start here)
- 150-250% - Heavy spill or difficult footage
Tip: In Spill Map view, you'll see the white areas grow/shrink as you adjust this.
Step 5: Fine-Tune with Refinement Controls
In the Spill Refinement group, adjust these as needed:
Expansion (default: 0%)
- Increase to 20-50% if spill remains on edges
- Lowers the detection threshold to catch more spill
- Too much will affect colors that aren't spilled
Softness (default: 0%)
- Increase to 20-60% for smoother, more natural transitions
- Higher values create gradual falloff
- Use when edges look harsh or digital
Desaturation (default: 0%)
- Increase to 20-40% to push despilled areas toward grayscale
- Helps eliminate residual color tints
- Smoothly transitions at edges
Step 6: Protect Important Colors (Optional)
If skin tones or wardrobe colors are being affected, enable protection:
- Open the Protection group
- Check Enable Protection
- Use the Protection Ranges gradient UI or set manually:
For skin tones:
- Hue: 0-30° (red/orange range)
- Saturation: 20-80%
- Luma: 20-80%
For other colors:
- Switch View Mode to "Protection Mask"
- Adjust ranges until white areas cover what you want to protect
- Black areas will be despilled
Adjust Protection Strength (default: 100%)
- Reduce to 70-80% if protection is too strong and leaving spill
Increase Protection Softness (default: 20%)
- Set to 30-60% for natural transitions between protected and despilled areas
Tip: Use View Mode: Protection Mask to preview - white = protected, black = despilled.
Step 7: Consider Color Replace (Optional)
If despill removes too much color and leaves areas washed out:
- Open the Color Replace group
- Check Enable Color Replace
- Set Replacement Color:
- Try neutral gray (128, 128, 128) first
- Or sample a color from the subject
- Adjust Color Strength to blend (try 30-60%)
Luma Correction (optional): Increase to 50-100% to match original brightness.
Step 8: Generate a Matte (Optional)
If you need an alpha channel based on spill removal:
- Open Alpha Handling group
- Check Silhouette Alpha
- Switch View Mode to "Alpha" to preview
- Adjust thresholds:
- Low Threshold: Drag up to eliminate weak edges (try 5-15%)
- High Threshold: Drag down to soften bright areas (try 90-95%)
- Apply Falloff if needed:
- Values > 1.0 contract the matte
- Values < 1.0 expand the matte
- Add Alpha Smoothing for softer edges (Smooth, Smoother, or Smoothest)
Step 9: Final Check
- Switch View Mode back to Normal
- Review your footage at full resolution
- Check that spill is removed and colors look natural
- Toggle the effect on/off to compare before/after
Next Steps
- Need parameter details? Check the Parameters page for complete descriptions
- Want to understand the algorithms? Visit Spill Algorithms for technical details
- Experiment! Every shot is different - try different algorithms and settings to find what works best